Okay, last week I went through the concept and design process and this week I’ll be running through the construction process.
Frames
As I said last week, all of the frames are made from 18mm x 38mm pine. It’s cheap, strong enough and easy to work with. To make it even easier to get square corners I made up a little jig with some scrap pieces of wood.
You can also see how each corner was fastened in this picture.
I then went through the process of rigging up the frames in my room: 1. to check how they would all fit in and 2. as it was a lot easier to hold and fasten light wooden frames rather than complete acoustic panels.
As you can see, I am lucky enough in my room to have an i-beam running down the centre of the studio which makes it super easy to fix the panels without having to drill holes. The panels on the ceiling were hung with stiff wire (roughly 1.5mm dia.).
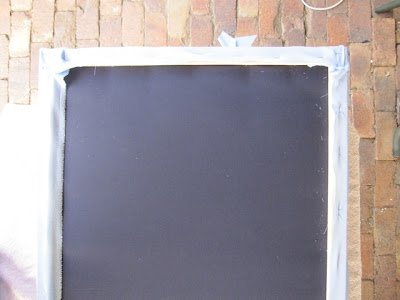
I then took all of the frames back outside to fix the backing fabric. You can see that I used staples about every 100mm to hold the fabric to the inside of the frames.
Cutting Insulation
The next job was to cut the insulation. Tontine Acoustisorb 3 is fairly easy to handle but rather difficult to cut. I took the hint from Timothy Allan when he built his acoustic panels and decided to use an angle grinder with a cutting blade to cut the sheets. I first attempted with scissors first but quickly found that my scissors would become blunt after cutting through about half a metre. So, I used a pen to draw up the straight cuts on the sheets and then ran the angle grinder through them.
One entire pack (three 1200x2400 sheets) was used to make the two corner bass traps and the other pack was used to make the six smaller acoustic panels. This picture shows the insulation on the wooden frame.
Finishing
Before wrapping the panels in fabric I stapled the first sheet of insulation to the wooden frames. This would help prevent the insulation from sliding down the panels over time.
In this picture you can see how the fabric is then wrapped around the insulation and fastened to the back of the frames with staples. I would always fasten one long side of the the panels and then the opposite side to ensure that the fabric was pulled tight. For some of the panels I had fabric with stripes so this technique would ensure that the lines were aligned to the frame. Here is one finished floor to ceiling bass trap.
In The Studio
Here they are, finally in the studio. The floor to ceiling bass traps were just large enough to wedge in the corners and didn’t require andy fastening. The panels on the walls are just propped up for the moment but will be fixed with fishing line to the upper skirting board shortly. I also have one panel that is hung directly behind the mixing position that you can’t see in these pics.
The Verdict
Incredible. It is amazing the difference this acoustic treatment does. Flutter echoes are no longer an issue, the bass response of the room is so much tighter and stereo imaging is pristine. I can tell that is going to be a pleasure to mix in this room. If I can get a hold of an acoustics measuring kit I’ll run some tests but next week I’ll show you guys a video that I am putting together with some before and after audio samples. Stay tuned.
Feel free to leave your comments.


4 comments:
Cool.
They could have been made a bit neater though, don't look very nice with Yamaha HS80's. i tried building some once but they looked awful up on the walls in my studio so I just purchased some from these guys in Aus. http://www.cmfacoustics.info
Yeah you are right there mate, they are not the most attractive items in my home studio. Luckily I'm the only one that has to look at 'em.
However, the two key factors that were taken into consideration when undertaking this project were price and functionality. The effective surface area was maximised while minimising material costs. You can't beat $44 a panel!
Hi mate,
really impressive work! amazing, I have checked out the A B comparison on youtube, the point really got clear what your installation is able to improve.... wouldn`t it be interesting though for the people out there, to:
playback test tones with defined frequencies from the ableton live settings dialog, record those, and afterwards capture screenshots of the live spectrum device showing the frequency response of your recordings? you must not disassemble your installation, because the test tone has a defined frequency. I would just love to see the frequency response of your room / speaker combo display by spectrum! this would really be interesting ;-) would love to hear from you, perhaps you find the time ro records this someday.
Thanks a lot mate for sharing! great work.
Best regards from germany
Hey Bjorn,
Thanks for the comments. Feel free to click on the "Contact" button at the top of this page and we can discuss this further.
Cheers.
Mark
Post a Comment